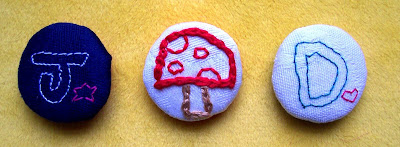
You know what are boring? Big white ugly plastic magnets like I got free with my magnetic pinboard....YUCK!!
And why would you keep them around when making your own magnet covers is sooooo easy? You are correct, there is no reason. Because i didn't want to shell out and buy a button-making kit, which automates much of this process....i had to do it this way.....
 Things you need:
* a stiff cardboard circle, the size of the final magnet cover (if you can't get very stiff cardboard just use a couple of layers of thinner stuff)
* a material circle, diameter just less than twice that of the cardboard circle (try to use a dense fibred material that will not fray easily at the edges, it's a lot easier!)
* a little piece of quilt batting or generic stuffing
* a piece of felt in a complimentary colour (the same size as the cardboard circle
*imagination
*large mug of tea (you may not need this, but i did!)
 First thing to do is to embroider (or draw) something fun onto the material circle. I used my machine for the letters and he is obviously in a huff with me at the minute and is therefore unable to sew in a straight line...groan. Run medium sized, evenly spaced stitches by hand around the outside edge as shown.
Place the circle mushroom-side-down and place the stuffing in the centre. Place the cardboard circle on the top and then pull the thread tight around the stuffing and cardboard as shown below . Secure the thread by sewing in a couple of the pleats and tie off.
And why would you keep them around when making your own magnet covers is sooooo easy? You are correct, there is no reason. Because i didn't want to shell out and buy a button-making kit, which automates much of this process....i had to do it this way.....
 Things you need:
 * a stiff cardboard circle, the size of the final magnet cover (if you can't get very stiff cardboard just use a couple of layers of thinner stuff)
* a material circle, diameter just less than twice that of the cardboard circle (try to use a dense fibred material that will not fray easily at the edges, it's a lot easier!)
* a little piece of quilt batting or generic stuffing
* a piece of felt in a complimentary colour (the same size as the cardboard circle
*imagination
*large mug of tea (you may not need this, but i did!)
 First thing to do is to embroider (or draw) something fun onto the material circle. I used my machine for the letters and he is obviously in a huff with me at the minute and is therefore unable to sew in a straight line...groan. Run medium sized, evenly spaced stitches by hand around the outside edge as shown.
 Place the circle mushroom-side-down and place the stuffing in the centre. Place the cardboard circle on the top and then pull the thread tight around the stuffing and cardboard as shown below . Secure the thread by sewing in a couple of the pleats and tie off.


1 comment:
I followed all the intructions to the letter, when suddenly there was the one thing I just don't have - imagination! You'll just have to make me one instead. Ha Ha! love MUM xox.
Post a Comment